With the ever-increasing amount of processed food and ready-made meals, doing belly fat exercise has become very important. This is because of the lack of proper nutrients and food content in these pre-packaged foods. Now, supplements and replacement meals are being shoveled at the consumers as a ‘fix’ for the problem they created. However, there is a healthier, less costly way in attaining belly fat loss: a change in lifestyle.
Lose Belly Fat
In order to lose belly fat, you don’t need to buy expensive, artificial products to attain your dream body: simply changing your diet and starting to work on belly fat loss exercise will do the trick, and will be way more sustainable.
Want to hear how simple changes can help you to lose belly fat? Keep on reading!
Eat Regularly
One of the best ways to ensure belly fat loss is to eat regularly and make sure that your meals are nutritious and filling. Eating at approximately the same time of the day, every day will allow your body to prepare for digesting food in advance, which in return will optimize the amount of nutrition your body absorbs.
Skipping meals or eating irregularly not only might end up in giving you a belly ache, but it will also prevent your body from digesting the food properly. As a consequence, the unwanted fat will slowly creep onto your waistline, without you even noticing it.
Don’t Skimp On Portions
Eating appropriate portions for your age group and build is also important. Skimping on meal size might give you immediate results, however, it will put your body in a starvation mode.
Your body will assume that the incoming food supply is very limited, and in return will try to store every single calorie that you consume, rather than burning it off. It’s way more effective to establish a routine and eat at regular hours without skipping meals in order to see significant belly fat loss.

Exercise Consistently
Belly fat loss exercise does not have to take hours. Even if it’s just 30 minutes, each activity counts!
Eating healthy can do wonders for belly fat loss, but if you really want to tone your waistline and speed up your weight loss, belly fat loss exercise is crucial.
A good exercise routine should contain a mixture of cardio exercises and strength training. Cardio keeps your heart rate at a consistent level that helps to burn off fat. Strength training helps to build muscle, which in return also helps to burn fat and lose weight.
Start Doing Cardio
A good way to start doing cardio is by spending 30 minutes a day walking at a fast pace. If you are more advanced, such activities like running, or even higher intensity workouts such as HIIT or Tabata intervals can be very beneficial.
The great thing about high-intensity workouts is that by training in intervals (e.g. 30 second high-speed running, 10-second rest, repeated 8 times), you can burn more fat. HIIT and Tabata help to increase your metabolic rate that lasts hours after you finished exercising, which is great for fat loss.
Add Some Strength Training
When it comes to strength training, most people assume that the only way to do it is by going to the gym. Don’t let not feeling strong enough to lift weights or not having the resources to go to the gym, keep you from doing belly fat loss exercise.
If you are a beginner you can start by doing body weight exercises. Once you feel more comfortable, you can add free weights to your routine, or look into signing up to a gym.
Put It All Together
For adults aged 18 to 64, World Health Organization recommends exercising at least 150 minutes per week, doing moderate intensity exercise. This translates to 30 minutes of exercise, 5 days a week.
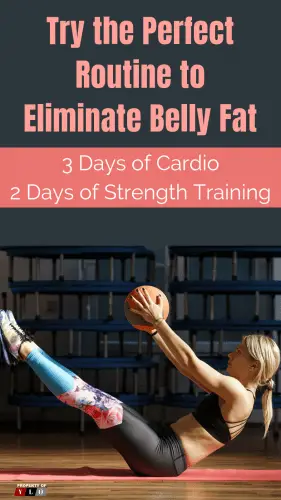
Combining 3 days of cardio and 2 days of strength training exercise will help you achieve an ultimate perfect routine for belly fat loss exercise.
1. The High Plank/Low Plank
1. Start by getting on your hands and knees. Draw your stomach in and bring your feet back behind you. Bring them behind you until they are straight.
2. Keep your hands right under your shoulders. Your gaze should be towards your mat and your neck should not be hanging low or help up high. Keep it aligned with the rest of your body.
3. Hold your stomach and your legs tight and keep your back and legs extended. Don’t have your back sagging or hanging out. Keep it tight and alert.
4. If you are having trouble with holding this pose, you can lower your knees and perform everything else the same way for a more modified version.
Hold this for 30 seconds
2. Boat Pose
1. Start by sitting down either on the ground or in a comfortable seat. Bring your navel in the direction of your spine and keep your core tight and awake. Keep your hands placed on the floor behind your body and bring your legs upward and off of the floor as you bend your knees.
2. Keep your core tightened and raise your arms up along with your legs. Your legs should be extended at this point, making your body look like the letter v. Keep your head looking forward and make sure that your spine is straight. If you find that you are really tight in your legs you can open them up a bit to ease tension.
3. Keep your core tight and keep a steady breath.
Hold this pose for 30 seconds.
3. Warrior 3
1. Keep your spine and core tight and engaged as you reach your arms in front of you and lift your legs behind you.
2. Reach your arms forward and your leg back until your body is aligned with the floor. Your eyes should be looking in the direction of your mat. Remember, don’t let your body sag, keep everything engaged.
3. Relax your shoulders and neck and keep a steady breath.
Hold for 30 seconds and then proceed by switching to the other side and doing the same thing.
4. Side Plank
1. Start in plank position and make sure that your feet and thighs touch.
2. Keep your stomach tight and open your arm in the air.
3. Lift your body and your waist and keep your breath steady.
Hold this pose for 30 seconds and repeat on the other side.
5. Twisted Scissors
1. Start lying on back with arms next to side and legs pointed straight into the air above hips. Press low back into the mat so abs are tight.
2. Lower right leg a few inches from the mat. As you raise right leg up, begin lowering left leg the same way. Continue switching right and left for the desired number of reps.
3. For added resistance and stretch, flex your torso up off the ground and grab each ankle as they stretch upward.
6. Bird Dog
1. Starting Position: Kneel on an exercise mat or floor, positioning your knees and feet hip-width apart, with your feet dorsiflexed
2. Slowly lean forward to place your hands on the mat, positioning them directly under your shoulders at shoulder-width with your fingers facing forward. Reposition your hands and knees as necessary so that your knees are directly under your hips and hands are directly under your shoulders.
3. Stiffen your core and abdominal muscles to position your spine in a neutral position, avoid any excessive sagging or arching.
Upward Phase:
4. This exercise involves simultaneous movement of your leg and contralateral (opposite) arm. This exercise is best performed facing a mirror. Hip Extension: Slowly extend your left hip (raise and straighten the knee) attempting to extend it until it is at, or near parallel, to the floor without any rotation in the hip. Your goal is to keep both hips parallel to the floor.
5. Shoulder flexion: Slowly flex your right arm (raise and straighten the arm) attempting to raise it until it is at, or near parallel, to the floor without any tilting at the shoulders. Your goal is to keep both shoulders parallel to the floor. Your head should remain aligned with the spine throughout the movement.
6. The degree of hip extension and shoulder flexion is determined by the ability to control against movement in the low back. As the leg is raised, individuals may witness an increase in lumbar lordosis (low back sagging). Only raise the limbs to heights where the low back position can be maintained through the combined actions of the core and abdominal muscles.
Downward Phase:
7. Gently lower yourself back to your starting position and repeat with the opposite limbs. The bird-dog is an excellent exercise to train the body how to stabilize the lumbar spine (low back) during upper and lower extremity movement. Never exceed your body’s capacity to control movement in the low back.

7. Spinal Twist
1. Lying on your back, bring your arms out to the sides with the palms facing down in a T position. Bend the right knee and place the right foot on the left knee.
2. Exhale drop the right knee over to the left side of your body, twisting the spine and low back. Look at the right fingertips.
3. Keep the shoulders flat to the floor, close the eyes, and relax into the posture. Let gravity pull the knee down, so you do not have to use any effort in this posture.
4. Breathe and hold for 6-10 breaths.
5. To release: inhale and roll the hips back to the floor, and exhale the leg back down to the floor.
8. Spiderman Pushups
1. Begin on all fours placing your hands on the floor slightly wider than shoulder-width apart. Your body should form a straight line from your ankles to your shoulders. Squeeze your abs as tight as possible and keep them contracted for the entire exercise.
2. As you lower into the push-up, pull one knee up and towards the elbow of the same side. Pause, then push your body back up and return the lifted leg back to the starting position. Alternate sides.
9. Burpees
1. Begin in a squat position with hands on the floor, slightly wider than shoulder width.
2. Kick feet back to the starting push-up position.
3. Immediately return feet to the squat position.
4. Jump up as high as possible from the squat, and drop back down to the starting position.
10. Basic Crunch]
<1. Lie on your back with your knees bent and feet flat on the floor, hip-width apart.
2. Place your hands behind your head so your thumbs are behind your ears.
3. Don’t lace your fingers together.
4. Hold your elbows out to the sides but rounded slightly in.
5. Tilt your chin slightly, leaving a few inches of space between your chin and your chest.
6. Gently pull your abdominals inward.
7. Curl up and forward so that your head, neck, and shoulder blades lift off the floor.
8. Hold for a moment at the top of the movement and then lower slowly back down.
To Wrap Up
As you can see, you don’t need to purchase expensive gear or supplements in order to lose belly fat. All you need is to improve your eating habits by eating nutritious and filling meals regularly and establish a belly fat loss exercise routine.
The combination of these simple steps will help you achieve belly fat loss in no time!
A helpful article by WebMD: 5 Fat-Burning Strategies
You Might Also Like These Similar Posts