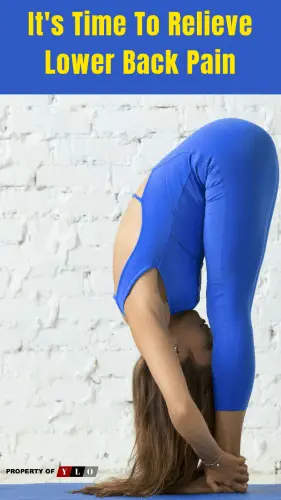
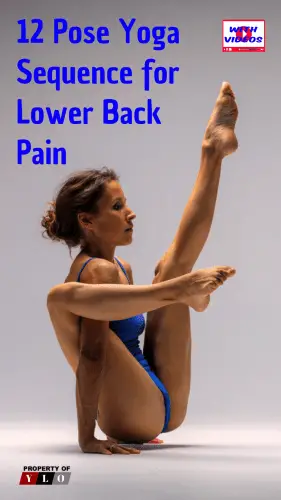
It’s good to know that some Yoga poses are able to help relieve lower back pain on both sides of your back because chronic lower back pain affects more than 85% of people living in the United States.
Lower Back Pain on Both Sides is Common
Some of the lower back pain is caused by trauma, some by age and many more because of simple issues such as the way they walk, stand or sit at work. Other than colds and flu it is the most common complaint about people visiting doctors in the country.
Back problems are the third most common reason for surgery in the country. What makes it worse is the fact that 25% of those surgeries are the result of the previous operations failing. That being said 25% of those will be unsuccessful and have to be repeated. Are you starting to get the picture, perhaps surgery is not such a good idea for treatment of lower back pain on both sides of your back?
Out of all of the people having these surgeries only 5% are good candidates for the procedures. It is an epidemic that is taking over the country and this is where alternative issues come in for you to try. However, NEVER disregard a doctors advice.
Listen to the advice but also ask pertinent questions before making your decisions. The first and foremost questions are whether or not there are alternatives to try and what, if any, are the possible problems that might be caused by trying those first.
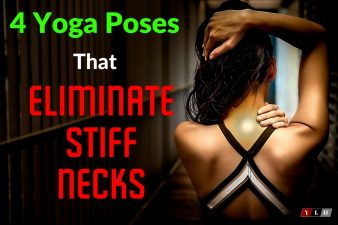
Yoga Back Pain Power
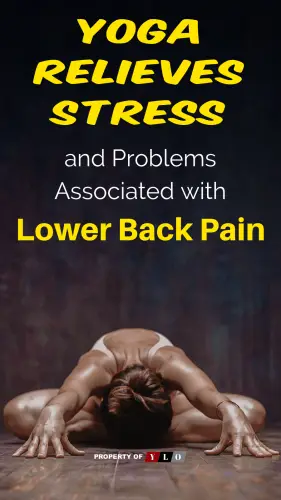
Some poses in Yoga can relieve the stress and problems associated with lower back pain on both sides of your back.
Pain from an injury should always be examined by a doctor immediately to determine the amount of damage and to recommend a treatment option. On the other hand, pain that is from poor habits and age could be alleviated to some extent by Yoga.
Yoga helps you in many ways, stretching your muscles, lengthening your spine and helping you with natural realignment. These three things can be the center of the problem and can be from the simplest of things.
I myself had never had any issue of any kind but I twisted my back wrong sliding into the seat of my automobile. It was the most debilitating pain I have ever experienced. Another big problem is sitting incorrectly staring at computer screens for hours on end at the office or at home.
Yoga Lowers Medication Requirements for Pain
In recent studies, people who practice some yoga for back pain were less likely to need any type of over the counter medication. Over half of them taking these meds were able to stop completely.
There are specific exercises and poses that help with these problems which we will describe for you here both in written and video form. Do these exercises at least two times a week as your body will allow. Just don’t do any exercises to a point that you experience pain or they will be counterproductive.
Pranayama Breathing Exercise
Begin with the Pranayama breathing exercise to relax your body first. You will need to try to control your breathing throughout the exercises. This technique is particularly beneficial in everyday life because it requires no special sound or position to achieve a grounded and relaxed state of awareness.
1. Sit in a comfortable cross-legged position like Easy Pose (Sukhasana), or lie on your back in Corpse Pose (Savasana).
2. Rest one hand on your belly and one hand on your rib cage.
3. Close your eyes, and breathe deeply but naturally.
4. Begin to focus your awareness on the breath as it moves in and out of your body.
5. Feel the lift of your belly and the expansion of your ribs on your inhalations; and the slight compression of your ribs and drop of your belly as you exhale.
6. Next, bring your bottom hand to your chest, just below your collarbone. Breathe all the way into this area and allow your chest to rise slightly; then exhale and let it go.
7. Feel your belly lift, ribs expand, and chest lift as you inhale; on your exhalations, notice how your chest drops, ribs contract, and belly lower.
8. Release your arms and focus your mind on your breath, inhaling and exhaling fully.
1. Child Pose
1. Begin on your hands and knees.
2. Spread your knees wide apart while keeping your big toes touching.
3. Sit up straight and lengthen your spine up through the crown of your head.
4. On an exhalation, bow forward, draping your torso between your thighs.
5. Keep your arms long and extended, palms facing down.
2. Cat and Cow Pose
1. Start on your hands and knees with your wrists directly under your shoulders, and your knees directly under your hips. Point your fingertips to the top of your mat. Place your shins and knees hip-width apart. Center your head in a neutral position and soften your gaze downward.
2. Begin by moving into Cow Pose: Inhale as you drop your belly towards the mat. Lift your chin and chest, and gaze up toward the ceiling.
3. Broaden across your shoulder blades and draw your shoulders away from your ears.
4. Next, move into Cat Pose: As you exhale, draw your belly to your spine and round your back toward the ceiling. The pose should look like a cat stretching its back.
5. Release the crown of your head toward the floor, but don’t force your chin to your chest.
6. Inhale, coming back into Cow Pose, and then exhale as you return to Cat Pose.
Repeat 5-20 times, and then rest by sitting back on your heels with your torso upright.
Come on to the balls of the feet and lift the hips up, then release the heels down toward the mat. This is another option to come back to in between poses.
#3. Downward Dog
Downward dog lengthens and strengthens at the same time. It’s also a big stretch for the hamstrings which can be the root of back pain. Take some time here to pedal the feet, twist the hips and rock side to side.
1. Begin on your hands and knees. Align your wrists directly under your shoulders and your knees directly under your hips. The fold of your wrists should be parallel with the top edge of your mat. Point your middle fingers directly to the top edge of your mat. Stretch your elbows and relax your upper back.
2. Spread your fingers wide and press firmly through your palms and knuckles. Distribute your weight evenly across your hands.
3. Exhale as you tuck your toes and lift your knees off the floor. Reach your pelvis up toward the ceiling, then draw your sit bones toward the wall behind you. Gently begin to straighten your legs, but do not lock your knees.
TIP: Bring your body into the shape of an “A.” Imagine your hips and thighs being pulled back from the top of your thighs. Do not walk your feet closer to your hands and keep the extension of your whole body.
4. Press the floor away from you as you lift through your pelvis. As you lengthen your spine, lift your sit bones up toward the ceiling. Now press down equally through your heels and the palms of your hands.
5. Firm the outer muscles of your arms and press your index fingers into the floor. Lift from the inner muscles of your arms to the top of both shoulders. Draw your shoulder blades into your upper back ribs and toward your tailbone. Broaden across your collarbones.
6. Rotate your arms externally so your elbow creases face your thumbs.
7. Draw your chest toward your thighs as you continue to press the mat away from you, lengthening and decompressing your spine.
8. Engage your quadriceps. Rotate your thighs inward as you continue to lift your sit bones high. Sink your heels toward the floor. Align your ears with your upper arms. Relax your head, but do not let it dangle. Gaze between your legs or toward your navel.
#4. Crescent Lunge On One Knee
1. Stand in mountain pose
2. Transition to the downward facing dog.
3. Step your right foot forward between your hands.
4. Raise your torso as you inhale.
5. Do not overarch your lower back.
6. Keep your front shin vertical.
7. Draw your front ribs down and into your torso.
8. Release the pose.
#5. Warrior 1
1. Begin in Mountain Pose (Tadasana), standing with your feet hip-distance apart and your arms at your sides. Let your thoughts settle. Focus on the present moment. Breathe deeply and evenly, calming your mind. Draw your awareness inward. Turn to the left.
2. Exhale as you step your feet wide apart, about 4 to 5 feet.
3. Turn your right foot out 90 degrees, so your toes are pointing to the top of the mat.
4. Pivot your left foot inwards at a 45-degree angle.
5. Align your front heel with the arch of your back foot. Keep your pelvis turned toward the front of your mat.
6. Press your weight through your left heel. Then, exhale as you bend your right knee over your right ankle. Your shin should be perpendicular to the floor. Lift through the arches of your feet, while rooting down through your ankles.
7. Reach up strongly through your arms. Broaden across your belly, lengthen the sides of your waist, and lift through your chest.
8. Keep your palms and fingers active and reaching.
9. You can keep your arms parallel, or press your palms together.
10. Gently tilt your head back and gaze up at your thumbs. Keep your shoulders dropped away from your ears. Feel your shoulder blades pressing firmly inward.
11. Press down through the outer edge of your back foot, keeping your back leg straight.
#6. Triangle Pose
1. Stand at the top of your mat with your feet hip-distance apart and your arms at your sides. Begin to pay attention to your breath. Let go of distractions. Breathe softly and fully. Take a moment to tune into your body and draw your awareness inward.
2. Step your feet wide apart, about 4 to 5 feet. Check to ensure that your heels are aligned with each other.
3. Turn your right foot out 90 degrees so your toes are pointing to the top of the mat. The center of your right knee cap should be aligned with the center of your right ankle.
4. Pivot your left foot slightly inwards. Your back toes should be at a 45-degree angle.
5. Lift through the arches of your feet, while rooting down through your ankles.
6. Raise your arms to the side to shoulder height, so they’re parallel to the floor. Your arms should be aligned directly over your legs. With your palms facing down, reach actively from fingertip to fingertip.
7. On an exhalation, reach through your right hand in the same direction as your right foot is pointed. Shift your left hip back so your tailbone and pelvis tilt toward the wall or space behind your left foot. Fold at your right hip.
TIP: Keep your right ear, shoulder, and knee on the same plane not letting your torso drop forward. Turn your left palm forward, with your fingertips reaching toward the sky.
8. Rest your right hand on your outer shin or ankle. If you are more flexible, place your right fingertips or palm on the floor to the outside of your right shin. You can also place your hand on a block. Align your shoulders so your left shoulder is directly above your right shoulder.
9. Gently turn your head to gaze at your right thumb.
10. Drawdown through the outer edge of your back foot. Extend equally through both sides of your waist. Lengthen your tailbone toward your back heel. Keep your left arm in line with your shoulders.
#7. Revolved Triangle
1. Start facing the long edge of the mat in a wide leg stance with the feet about 3-4 ft / 1 meter apart, heels in line with each other, toes pointing forwards.
2. Turn your right foot 90 degrees to point to the back (short end) of the mat and your left foot in about 45 degrees
3. Bring your hands to your hips and square your hips to face the back of the mat.
4. Make your legs strong. Engage your pelvic floor muscles and draw your lower belly in and up.
5. Inhale and lengthen the spine and raise the left arm up.
6. Exhale as you hinge from the hips to bring your upper body parallel with the floor – keep reaching the left arm
forward, lengthening the spine and the back of the neck.
7. Place your left hand on the floor (or a block) on the outside of your right foot.
8. Bring your right hand onto your lower back/sacrum.
9. Press firmly through both feet.
10. Move the right sit bone backward to stop it swinging out to the side.
11. Inhale lengthen the spine.
12. Exhale twist to the right, bringing your right shoulder over the left, raise the right arm.
#8. Locust Pose
1. Begin lying on your stomach with your arms at your sides. Rest your forehead on the mat. Extend your legs straight behind you, hip-width apart. Do not roll your heels inward or outward. Instead, press your weight evenly across the tops of both feet.
2. Inhale and raise your head to look forward. On your exhale, lift your chest and arms. Keep your arms alongside your body with your palms facing down. Lift your upper spine and reach your arms back toward your feet.
3. Use your inner thighs to lift your legs up toward the ceiling. Reach straight back through the balls of your feet. Your weight should rest on your lower ribs, belly, and front pelvis.
4. Keep your chest lifted as you widen across your collarbones. Draw your shoulder blades into your back ribs and extend them away from each other.
5. Gaze at your cheeks. Keep your breath smooth and even.
#9. One Leg Forward Fold
1. Sitting with your back straight, extend the right leg and flex your toes towards your face.
2. Bend your left knee and bring the sole of that foot to the inside of the right thigh
3. Inhale and extend the hands, arms and the crown of the head up to the sky and turn your torso so that you are facing the extended leg
4. Exhale, hinge at the hips right over the right leg.
5. Take a hold of your calf, ankle, or sole of the right foot.
6. Stay here for five deep breaths and repeat on the other side.
#10. Knees To Chest
1. Begin by lying on your back, with your legs and arms extended.
2. As you exhale, draw both of your knees to your chest. Clasp your hands around them. If it is possible for you, wrap your forearms over your shins and clasp each elbow with the opposite hand.
3. Keep your back flat on the mat. Release your shoulder blades down toward your waist. Broaden across your collar bones.
4. Draw your tailbone and sacrum down toward the mat, lengthening your spine even more.
5. If it is comfortable for you to do so, softly rock backward and forward or side-to-side for a gentle spinal massage.
6. Tuck your chin slightly and gaze down the center line of your body.
#11. SupportedTwist
1. Lying on your back, bring your arms out to the sides with the palms facing down in a T position. Bend the right knee and place the right foot on the left knee. For Restorative yoga use a prop.
2. Exhale drop the right knee over to the left side of your body, twisting the spine and low back. Look at the right fingertips.
3. Keep the shoulders flat to the floor, close the eyes, and relax into the posture. Let gravity pull the knee down, so you do not have to use any effort in this posture.
4. Breathe and hold for 6-10 breaths.
5. To release: inhale and roll the hips back to the floor, and exhale the leg back down to the floor.
6. Repeat on the alternate side.
#12. Supported Corpse Pose
1. Lie on your back with your legs straight and arms at your sides. Rest your hands about six inches away from your body with your palms up. Let your feet drop open. Close your eyes. You may want to cover your body with a blanket.
2. Let your breath occur naturally.
3. Allow your body to feel heavy on the ground.
4. Working from the soles of your feet up to the crown of your head, consciously release every body part, organ, and cell.
5. Relax your face. Let your eyes drop deep into their sockets. Invite peace and silence into your mind, body, and soul.
6. Stay in Savasana for five minutes for every 30 minutes of your practice.
Do this simple exercise program two to three times a week and feel the difference. You can do it either morning or evening as your times allows.
Yoga has been used for centuries and by many cultures in some form to relieve stress and pressure on both body and mind. When used regularly it will be a big part of the healing process for you and make your life a happier and fuller place.
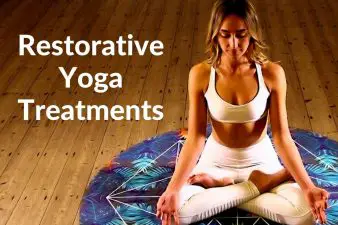
Should you need help check for Restorative Yoga classes in your neighborhood. You will find them at community centers and senior centers free of charge many times.
A helpful article by WebMD: Good and Bad Exercises for Low Back Pain
You Might Also Like These Similar Posts