People are affected differently by lower back pain. It is one of the biggest impediments to an active lifestyle. Common types of lower back pain are mechanical and are derived from people’s actions, rather than a condition. Some of the things that cause lower back pain are sleeping on a poorly made mattress, sleeping in awkward positions, and starting exercise routines improperly.
Common Causes of Lower Back Pain
Doing squats or deadlifts incorrectly, by not exercising the stomach, or by jumping and landing on your heels instead of your toes can cause lower back pain. These are all examples of lower back pain caused by mechanics. However, people can get back pain from conditions also.
Some conditions include a ruptured disk, a herniated disk, arthritis, or pregnancy. All these things will cause lower back pain to varying degrees, with some of the pain being more severe. It is important to relieve lower back pain as soon as possible and to see a specialist if your pain becomes severe or is prolonged.
Here are six natural ways to ease the lower back pain.
1. Get A Massage
A massage by a licensed massage therapist is one of the ways you can help relieve back pain. A lot of back pain is caused by very tight back muscles in the lower back, or by straining one of the long muscles in the back due to heavy lifting.
What you should do in this case is try to ease the strain on the muscles and loosen them. Do this by seeing a licensed massage therapist, who can ease your muscles with some science-based technique. Massage works for long after the massage is over, and is important because it doesn’t cause strain to the sufferer.
You can get a lighter massage to start out, or sign up for a real deep tissue massage if you think you can handle it for long-term relief.
Massage varies in its technique and fees. You can get a medical massage from a clinically licensed massage therapist or a simple stress-relief massage by a masseuse/masseur. They will both work but they will have varying long-term effects.
If you feel you may have a ruptured disc or a severely strained muscle, see a more experienced therapist. Ask about how many specialty licenses they have while you shop around, and find out just how much an expert can do for you.
Massage can be used to dramatically change posture and alter back health, or it can just be a good way to release back tension.
2. Get Some Heat
Putting heat on the back is another way to relieve bruising of muscles and to relax extremely tight back muscles. Heat can be short-term (five to 20 minutes) or long-term (up to several hours).
You can get the right type of heat with a hot water bottle, a heating pad, a rice pillow, a hot bath, or a Jacuzzi. You will want to make sure you are in a comfortable chair or bed and have the ability to relax all the way. Don’t wiggle too much, and make sure the heat source stays put for maximum comfort.
3. Try Working With A Physical Therapist
Some back pain is due to sprains, imbalanced walking, or other odd conditions related to mobility. These conditions can often be helped with some physical therapy. They help the back to become stronger in a more balanced way and can help release stress through some exercise as well.
What this means is that the back will not be tense on one side or overused and weak on the other, which can cause various health conditions including lower back pain. Physical therapy also helps if your back pain is related to another injury, especially concerning your leg muscles, knees, or ankles. You can amend the muscles around the injury and decrease your back pain by doing so.

4. Change Your Diet For The Better
Diets need work sometimes. A good diet for lower back pain is high in potassium, sulfates, magnesium, and omega-3 foods. Healthy foods for this type of diet is one rich in greens such as spinach, collard greens, or beet greens as a base. Added to that you should include bananas, potatoes, and redfish or caviar.
You can also add spices like turmeric for added inflammation control. Check out the natural foods section for mangoes, papaya, plantain, guava, elderberries, and other foods you might not normally try for potassium and sulfates. Online there are several nutrition fact guides, or you can consult a dietitian for more info on foods if you don’t see enough choices at the grocery store. You want to consume extra vitamins and minerals to reduce the back pain and to try to kill inflammation.
Smoothies or granola are fabulous ways to get added fruit to your diet, especially high fiber fruit. It is true that your stomach will start “flushing” a little better on that much fruit, but that is important for reducing lower back pain.
You can reduce a lot of soreness and bloat with a diet high in these nutrients and high in fiber. However, if you notice that you have blood in your stool or that the fruit upsets your stomach, you should see a doctor as you could have a liver or kidney infection.
Try a greens smoothie or vegetable soup if you have trouble eating that many greens raw, and try smoking the fish or taking fish oil if it is hard to get enough fish down.
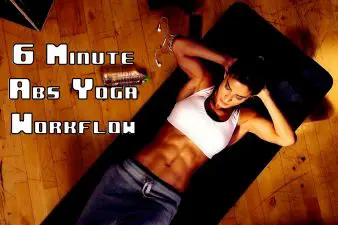
5. Abdominal Exercise
Did you know that doing ab workouts can help get rid of back pain? Some people may not be able to do many ab sets if they are in serious back pain, and you should NOT try to push through major back pain on an exercise routine without the help of a physical therapist.
However, you can improve mild back pain on your own by doing ab exercises. Basic ab exercises include crunches, sit-ups, and versions of the “Superman”. These will lightly work your back also, which will help uncoil any knots you may have.
Strengthening your abs provides support for your back, which is the basic principle behind treating back or spinal pain. It effectively brings posture support and relieves muscular stress on your back by taking more of the burden of movement onto your stomach.
It is important that you do not do exercises that cause hyperventilation or that tear muscles, so be careful when starting a new routine. Always start with a warm-up and take time to cool down.
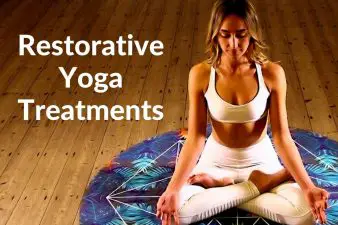
Some very effective routines for treating back pain can be found in yoga (especially hot yoga) and Pilates. These have classes that have varying degrees of difficulty. So, don’t be afraid to start small with these routines as they can become very intense.
Try a class a week and work up to two or three routines a week as you find you can accomplish the routines without pain. As you get stronger your back will hurt less, you will find that you stand straighter, and you will walk more evenly. Yoga is an ancient art that practices holding poses. This can be very effective for people who find that running is difficult on a bad back, and it is calming and quiet as well.
Pilates is slightly more motion driven than yoga, but it is also fairly low impact. Neither of these exercise routines which provide incredible core workouts contains jumping or fast action arm motion like Zumba or Insanity workouts do. This is important for minimizing the risk of spinal injury if you are exercising with back pain.
6. See A Chiropractor
A chiropractor may be the person you need to see if your back pain is very serious or the pain won’t go away with simple treatments even if it is minor. He or she can effectively adjust your spine, and sometimes chiropractic clinics have massages for extra support.
Chiropractors can also do things like treat whiplash in the neck, which can lead to back pain in addition to neck pain. They can adjust the hips and shoulders as well, which can cause back pain if they are out of place.
Minimizing back pain can be a slow process. It takes weeks of proper diet correction sometimes, but a determined person can stick with it. You should always see a doctor and possibly go to the emergency room if you cannot walk or if the back pain has severe side effects like spotty vision or migraines.
Sometimes, other conditions can accompany back pain and they may be less visible. Kidney infections, osteoporosis, and arthritis are a few of the more serious conditions that can occur with back pain. If you take some basic steps to cure your pain and it doesn’t go away, even if it is minor, see a doctor or chiropractor.
Chiropractic adjustments can be very important for spinal correction and a doctor can at least reassure you that there is nothing more serious going on.
5 Yoga Poses to Relieve Pain
Boat
1 Begin seated with your knees bent and feet flat on the floor, hands resting beside your hips. Draw your awareness inward and focus on your breath. Allow your inhalations and exhalations to be smooth, calm, and even.
2 Keeping your spine straight, lean back slightly and lift your feet, bringing your shins parallel to the floor.
3 Draw in your low back, lift your chest, and lengthen the front of your torso. Then, extend your arms forward, in line with your shoulders with your palms facing each other.
4 Balance on your sit bones, keeping your spine straight. Take care not to let your lower back sag or chest collapse.
5 Lengthen the front of your torso from your pubic bone to the top of your sternum. The lower belly (the area below your navel) should be firm and somewhat flat, but not hard or thick.
6 With an exhalation, straighten your legs to a 45-degree angle from the ground, bringing your body into a “V” shape.
7 Keep your breath easy, steady, and smooth. Focus your awareness within. Soften your eyes and your face. Gaze at your toes.
8 Spread your shoulder blades wide and reach out through your fingers, actively engaging your hands. Stay in the pose for five breaths, gradually working up to one minute. To release the pose, exhale as you lower your legs and hands to the floor.
Cat and Cow Pose
1 Start on your hands and knees with your wrists directly under your shoulders, and your knees directly under your hips. Point your fingertips to the top of your mat. Place your shins and knees hip-width apart. Center your head in a neutral position and soften your gaze downward.
2 Begin by moving into Cow Pose: Inhale as you drop your belly towards the mat. Lift your chin and chest, and gaze up toward the ceiling.
3 Broaden across your shoulder blades and draw your shoulders away from your ears.
4 Next, move into Cat Pose: As you exhale, draw your belly to your spine and round your back toward the ceiling. The pose hould look like a cat stretching its back.
5 Release the crown of your head toward the floor, but don’t force your chin to your chest.
6 Inhale, coming back into Cow Pose, and then exhale as you return to Cat Pose.
Chair Pose
1 Begin standing in Mountain Pose or Tadasana, with your feet separated hip distance apart and parallel to one another. Spread your toes wide and ground down through all four corners of your feet—the big toe mound, pinky toe mound, and the two outer edges of the heels.
2 On an inhale, sweep your arms overhead with your palms facing one another. Keep your ears in line with your arms and relax your shoulders.
3 Exhale and bend your knees deeply, as if you are sitting into a chair. Bring your thighs as close to parallel with the floor as your body feels comfortable allowing, and keep your knees hip distance apart.
4 Keep your weight grounded firmly through your heels and shift your hips back until your knees begin to stack directly over your ankles.
5 Notice also if your torso begins to collapse forward, and instead keep your chest slightly lifted and your collarbone broad. Firm up the low belly to create a sense of tone.
6 Allow your tailbone to point straight down toward the ground and maintain length along your spine.
7 Hold the pose for five full, deep breaths. To come out of the pose, straighten your legs on an inhale, and bring your arms to your sides on an exhale; alternately, use an exhale to fold forward into Uttanasana for a more passive exit.
Chaturanga
1 To begin this asana, ease into the Plank Pose, ensuring the outer edge of your shoulders is in the same line as your middle fingers on the floor.
2 Spread out your fingers such that they are wide and slightly curled. Grip the floor with the corners of your hands so that a small pocket of air is trapped between your palms and the mat.
3 Inhale and stretch from the heels to the crown of your head.
4 Exhale and lower your body slowly into half a push-up, such that the upper arms are parallel to the floor.
5 The tips of your elbows must lightly touch the sides of your ribs as you lower yourself to maintain a 90-degree angle in the crook of the elbows.
6 Hold the asana, but continue to stretch from the heel to the crown. Your shoulders must be drawn in and plunged into the back.
7 Exhale and release. You could either come into the Plank Pose or the Adho Mukha Svanasana.
Child’s Pose
1 Kneel on the floor. Touch your big toes together and sit on your heels, then separate your knees about as wide as yourhips.
2 Exhale and lay your torso down between your thighs. Broaden your sacrum across the back of your pelvis and narrow your hip points toward the navel, so that they nestle down onto the inner thighs. Lengthen your tailbone away from the back of the pelvis while you lift the base of your skull away from the back of your neck.
3 Lay your hands on the floor alongside your torso, palms up, and release the fronts of your shoulders toward the floor. Feel how the weight of the front shoulders pulls the shoulder blades wide across your back.
4 Balasana is a resting pose. Stay anywhere from 30 seconds to a few minutes. Beginners can also use Balasana to get a taste of a deep forward bend, where the torso rests on the thighs. Stay in the pose from 1 to 3 minutes. To come up, first lengthen the front torso, and then with an inhalation lift from the tailbone as it presses down and into the pelvis.
Click On The Images To View A Few Similar Posts