To fully understand how you can lose weight quickly with yoga you need to understand that our bodies are composed of our mind, our physical body, and our soul. Each layer will have an impact on the others. When one part of our being is unbalanced the rest will follow. Your body cannot be healthy if your soul and mind are not balanced. Yoga will be able to create harmony for the entire body and will allow you to live a productive life. When everything gets along you will be balanced and will have a chance to be successful at weight loss. We are going to take a closer look at the three layers.
The Mental
Our mind makes us aware of our surroundings. We need to disconnect from our ego. The ego leads to unhealthy attachments and is responsible for our decision making. When you are able to stop obsessing and worrying, positive things will follow.
Instead of worrying about the ego you can start to feel good. Your bad habits will show themselves. This will allow you to improve your decision making and make healthier choices. This can lead to healthier choices including weight loss so you can begin to lose weight quickly.
The Physical
Yoga has a number of different poses which will change the flow of the body. All of these positions provide a number of physical benefits. All of them provide some level of detoxification. This can lead to weight loss and remove waste from the body.
If you want to lose the fat and keep it off the yoga flow is what you should focus on. There are a number of flows and positions that mix cardio with strength training. This will help burn off extra fat so you can lose weight quickly and increase lean muscle mass. The typical yoga workout will burn between 400 and 600 calories an hour. This is the same as the number of calories burnt off at the gym in an hour.
The Soul
Yoga will help you get in touch with the soul. This will help you eliminate unhealthy habits from your life. For example, you may eat to the point where you are stuffed. You may also drink until you can no longer walk straight. These are not good habits and they do not make you feel good.
Putting it Together
In 2005 yogi enthusiast and medical researcher Alan Kristal, DPH, MPH studies yoga and weight loss. He surveyed 15,500 healthy men and women that were middle-aged. They had to log their physical activity including yoga and their weight between the ages of 45 and 55. The data was then examined as well as diet and exercise.
The researchers found that when a person lost weight through practicing yoga they were able to keep the weight off. Practicing yoga meant doing the moves at least 30 minutes a week for at least four years.
Yoga combines breathing with static poses and power yoga uses faster movement. This allows you to control your breathing and give your entire body a workout.
Many people begin yoga for different reasons and learn how to control their weight. Active yoga can improve your entire life.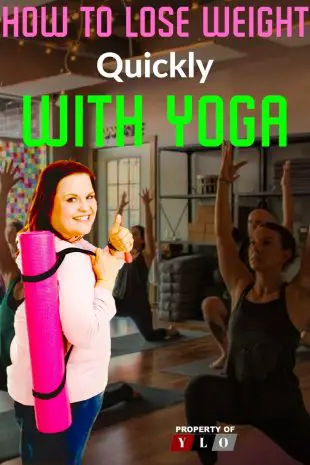
Lose Weight Quickly With Yoga and Your New Lifestyle
Yoga can be a great way for you to get into shape. There are some tips to help you get started with your yoga program and begin to lose weight quickly.
1. When performing yoga practice is a room that does not have mirrors. This will allow you to focus on your internal performance rather than your eternal performance.
2. Learn the feel of the moves down to the smallest movement. It is important to find your edge where your body will be challenged. This should be hard but not overwhelming.
3. Accept the state of mind
4. Allow your body to rest when tired.
5. Mix your moves with positive self-talk. Praise your effort.
6. Go to yoga class loyally. If you are doing yoga at home set aside a set time in the day.
7. You are not only giving your body a workout but developing important qualities including patience, discipline, and kindness.
8. Look for a yoga teacher that balances firmness and gentleness. They should inspire you to keep going.
9. Realize that purchasing a yoga DVD or going to class is a step towards you being a better person. Use this to keep you going.
10. Your effort does not just inspire you but those around you as you become a better person inside and out.
Let us know if you have tried using Yoga to lose weight and how it is working for you. Our readers all are looking for information on different ways to assist in weight loss.
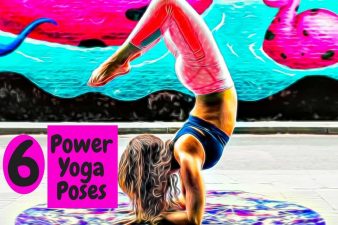
10 Poses for Beginners
Boat
1 Begin seated with your knees bent and feet flat on the floor, hands resting beside your hips. Draw your awareness inward and focus on your breath. Allow your inhalations and exhalations to be smooth, calm, and even.
2 Keeping your spine straight, lean back slightly and lift your feet, bringing your shins parallel to the floor.
3 Draw in your low back, lift your chest, and lengthen the front of your torso. Then, extend your arms forward, in line with your shoulders with your palms facing each other.
4 Balance on your sit bones, keeping your spine straight. Take care not to let your lower back sag or chest collapse.
5 Lengthen the front of your torso from your pubic bone to the top of your sternum. The lower belly (the area below your navel) should be firm and somewhat flat, but not hard or thick.
6 With an exhalation, straighten your legs to a 45-degree angle from the ground, bringing your body into a “V” shape.
7 Keep your breath easy, steady, and smooth. Focus your awareness within. Soften your eyes and your face. Gaze at your toes.
8 Spread your shoulder blades wide and reach out through your fingers, actively engaging your hands. Stay in the pose for five breaths, gradually working up to one minute. To release the pose, exhale as you lower your legs and hands to the floor.
Cat and Cow Pose
1 Start on your hands and knees with your wrists directly under your shoulders, and your knees directly under your hips. Point your fingertips to the top of your mat. Place your shins and knees hip-width apart. Center your head in a neutral position and soften your gaze downward.
2 Begin by moving into Cow Pose: Inhale as you drop your belly towards the mat. Lift your chin and chest, and gaze up toward the ceiling.
3 Broaden across your shoulder blades and draw your shoulders away from your ears.
4 Next, move into Cat Pose: As you exhale, draw your belly to your spine and round your back toward the ceiling. The pose hould look like a cat stretching its back.
5 Release the crown of your head toward the floor, but don’t force your chin to your chest.
6 Inhale, coming back into Cow Pose, and then exhale as you return to Cat Pose.
Chair Pose
1 Begin standing in Mountain Pose or Tadasana, with your feet separated hip distance apart and parallel to one another. Spread your toes wide and ground down through all four corners of your feet—the big toe mound, pinky toe mound, and the two outer edges of the heels.
2 On an inhale, sweep your arms overhead with your palms facing one another. Keep your ears in line with your arms and relax your shoulders.
3 Exhale and bend your knees deeply, as if you are sitting into a chair. Bring your thighs as close to parallel with the floor as your body feels comfortable allowing, and keep your knees hip distance apart.
4 Keep your weight grounded firmly through your heels and shift your hips back until your knees begin to stack directly over your ankles.
5 Notice also if your torso begins to collapse forward, and instead keep your chest slightly lifted and your collarbone broad. Firm up the low belly to create a sense of tone.
6 Allow your tailbone to point straight down toward the ground and maintain length along your spine.
7 Hold the pose for five full, deep breaths. To come out of the pose, straighten your legs on an inhale, and bring your arms to your sides on an exhale; alternately, use an exhale to fold forward into Uttanasana for a more passive exit.
Chaturanga
1 To begin this asana, ease into the Plank Pose, ensuring the outer edge of your shoulders is in the same line as your middle fingers on the floor.
2 Spread out your fingers such that they are wide and slightly curled. Grip the floor with the corners of your hands so that a small pocket of air is trapped between your palms and the mat.
3 Inhale and stretch from the heels to the crown of your head.
4 Exhale and lower your body slowly into half a push-up, such that the upper arms are parallel to the floor.
5 The tips of your elbows must lightly touch the sides of your ribs as you lower yourself to maintain a 90-degree angle in the crook of the elbows.
6 Hold the asana, but continue to stretch from the heel to the crown. Your shoulders must be drawn in and plunged into the back.
7 Exhale and release. You could either come into the Plank Pose or the Adho Mukha Svanasana.
Child’s Pose
1 Kneel on the floor. Touch your big toes together and sit on your heels, then separate your knees about as wide as yourhips.
2 Exhale and lay your torso down between your thighs. Broaden your sacrum across the back of your pelvis and narrow your hip points toward the navel, so that they nestle down onto the inner thighs. Lengthen your tailbone away from the back of the pelvis while you lift the base of your skull away from the back of your neck.
3 Lay your hands on the floor alongside your torso, palms up, and release the fronts of your shoulders toward the floor. Feel how the weight of the front shoulders pulls the shoulder blades wide across your back.
4 Balasana is a resting pose. Stay anywhere from 30 seconds to a few minutes. Beginners can also use Balasana to get a taste of a deep forward bend, where the torso rests on the thighs. Stay in the pose from 1 to 3 minutes. To come up, first lengthen the front torso, and then with an inhalation lift from the tailbone as it presses down and into the pelvis.
Cobra Pose
1 Place your hands palms down on the ground beneath your shoulders.
2 Lift your chest up off the ground by straightening your arms.
3 Gaze upwards and keep your abdominals engaged.
Downward Dog
1Begin on your hands and knees. Align your wrists directly under your shoulders and your knees directly under your hips. The fold of your wrists should be parallel with the top edge of your mat. Point your middle fingers directly to the top edge of your mat.
Stretch your elbows and relax your upper back.
2 Spread your fingers wide and press firmly through your palms and knuckles. Distribute your weight evenly across your hands.
3 Exhale as you tuck your toes and lift your knees off the floor. Reach your pelvis up toward the ceiling, then draw your sit bones toward the wall behind you. Gently begin to straighten your legs, but do not lock your knees. Bring your body into the shape of an “A.” Imagine your hips and thighs being pulled back from the top of your thighs. Do not walk your feet closer to your hands and keep the extension of your whole body.
4 Press the floor away from you as you lift through your pelvis. As you lengthen your spine, lift your sit bones up toward the ceiling. Now press down equally through your heels and the palms of your hands.
5 Firm the outer muscles of your arms and press your index fingers into the floor. Lift from the inner muscles of your arms to the top of both shoulders. Draw your shoulder blades into your upper back ribs and toward your tailbone. Broaden across your collarbones.
6 Rotate your arms externally so your elbow creases face your thumbs.
7 Draw your chest toward your thighs as you continue to press the mat away from you, lengthening and decompressing your spine.
8 Engage your quadriceps. Rotate your thighs inward as you continue to lift your sit bones high. Sink your heels toward the floor.Align your ears with your upper arms. Relax your head, but do not let it dangle. Gaze between your legs or toward your navel.
Goddess Pose
1 Begin in a standing position with feet shoulder width apart , toes turned out and arms reaching straight up overhead.
2 Bend your knees to a 90 degree angle and pull your elbows slightly inward to shoulder height. Keep hands open.
3 Make sure your posture is tall and straight, as if you slid your back down along a wall. Keep abs tight.
4 Hold and breathe for 30 seconds as you continue to open knees outward and lower your shoulder blades down.
Happy Baby Pose
1 Stretch your elbows and relax your upper back.
2 Spread your fingers wide and press firmly through your palms and knuckles. Distribute your weight evenly across your hands.
3 Exhale as you tuck your toes and lift your knees off the floor. Reach your pelvis up toward the ceiling, then draw your sit bones toward the wall behind you. Gently begin to straighten your legs, but do not lock your knees. Bring your body into the shape of an “A.” Imagine your hips and thighs being pulled back from the top of your thighs. Do not walk your feet closer to your hands and keep the extension of your whole body.
4 Press the floor away from you as you lift through your pelvis. As you lengthen your spine, lift your sit bones up toward the ceiling. Now press down equally through your heels and the palms of your hands.
5 Firm the outer muscles of your arms and press your index fingers into the floor. Lift from the inner muscles of your arms to the top of both shoulders. Draw your shoulder blades into your upper back ribs and toward your tailbone. Broaden across your collarbones.
6 Rotate your arms externally so your elbow creases face your thumbs.
7 Draw your chest toward your thighs as you continue to press the mat away from you, lengthening and decompressing your spine.
8 Engage your quadriceps. Rotate your thighs inward as you continue to lift your sit bones high. Sink your heels toward the floor.Align your ears with your upper arms. Relax your head, but do not let it dangle. Gaze between your legs or toward your navel.
Yogi Squat
1 Begin on feet, crouched down with tailbone between ankles and hands in prayer at chest.
2 Continue to press hands firmly together while at the same time pressing elbows against inner thighs.
3 Hold and breathe for 30 seconds.
Click On The Images To View A Few Similar Posts