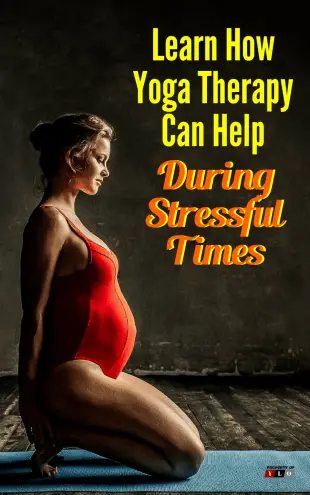
Restorative Yoga sequences are used In Yoga Therapies. These are 1-on-1 sessions for the alleviation of stress, anxiety, pain, panic, depression, to name a few.
What Are Yoga Therapies?
Most Americans have heard of Yoga. It is taught in schools and Universities around the world, not to mention in private venues, as a way to support good health and promote self-improvement. However, it is unlikely that many people have heard that Yoga can be used to treat psychological and physical ailments.
It is only recently gaining enough traction in the medical community to be considered. This form of yoga, however, goes by a slightly different name, “yoga therapies.”
Many people consider yoga therapeutic, regardless, so this has caused some confusion over what the difference is between the two. That is what this article aims to address while also informing those interested in some of the processes.
How Are Yoga Therapies Different from Yoga?
This form of therapy was first brought to public attention in the 1920s by Swami Kuvalyananda, who coined the term yoga therapies. It was based on the belief that people could measure the physical and physiological changes that occurred in a person while they were doing yoga.
This opened the mind of researchers about exploring the avenue. Research has shown the benefits in various ways. Here are a couple of examples.
1. It is not unfamiliar for older individuals, or people who have been in accidents to have some residual pains. This coming from being thrown into an awkward position or the regular wear and tear of age.
Yoga therapies, much like yoga itself focuses on breathing exercises and positions. Many of these positions are designed to lightly stretch and ultimately relax muscles.
This makes it highly beneficial in releasing the body’s muscle tension which is generally where pain derives from. In this same respect, a mentally disturbed person might benefit more fully from the breathing side of the exercises.
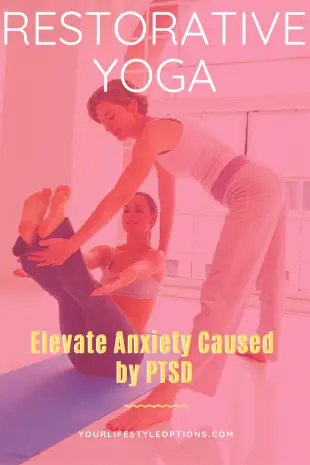
2. Someone with Post-Traumatic Stress Disorder (PTSD) is bound to have episodes of extreme panic and tension as they recall the event in question that caused the disorder. The goal of the yoga therapist is to take the person suffering from the disorder and to teach them techniques in which to combat these episodes.
Whether that be breathing or position based would, of course, depend on the patient. Some may respond more easily to such an episode by some sort of physical release of tension while others may need to focus on their breathing instead.
Other Differences Between Yoga and Yoga Therapies
First, yoga therapies are designed around an individual.
It focuses on the individual and their specific needs. This means that the sessions are more one on one, but can extend to a very small group.
It also means that the therapist is more mindful of their client’s physical and emotional capabilities. The Yoga therapist will only guide their patient into positions that they can easily maintain and that will be beneficial in treating the overall ailment. Tailoring the course to the client rather than following their own methods.
Second, the “instructors” are trained differently.
The Yoga Therapist has at least 500 hours of training in this particular field and is well versed in medical knowledge. They are for all intents and purposes, a proper therapist.
This means that, as with any Therapist, they are trained to listen and accommodate their patient’s needs. If this means that perhaps they have to repeat things or try a different method then they originally thought, they will.
They are acknowledged and often work in accordance with Doctors of all kinds. This is not to say that Yoga Therapies are a substitute for proper health or mental care, but rather should be considered synchronous with them. It is first and foremost a treatment, not a diagnosis.
Third, the therapist listens.
The first Step in yoga therapies is listening. The first session may well go like a doctor’s visit, in which the person discusses their afflictions.
Whether they be mental or physical, no problem is too big or too small to approach the yoga therapist with. They will then take the information they have been given and build a highly personalized experience that sets yoga and yoga therapies apart.
In conclusion, the biggest difference between the two forms of yoga lies in the atmosphere. Yoga Therapies are meant to be client led and focused sessions.
They are meant to provide a compassionate place in which the client can recover and grow. The recovery process takes time but given enough patience and effort on both sides the treatment may prove more effective than conventional means. It is to that end that doctor’s and psychologists would recommend it.
Simple Restorative Yoga Sequence For Spine and Scoliosis
1. Neutral Spine Position
Use the following exercise to help you find a neutral position for your spine.
- Step 1: Rock your buttocks back to create a big curve in your back.
- Step 2: You may stick out your chest to compensate for the weight shift and end up looking like a Barbie doll: chest puffed out, back swayed, buttocks sticking out behind you, and, often, shoulder blades pulled back too far — a posture that can put pressure on your lower back and tighten the front of your hips.
- Step 3: Tip your belly forward and try to tuck your buttocks underneath you.
- Step 4: You may sink your chest to compensate for this move and end up looking like a Neanderthal: chest caved in, shoulders rounded forward, buttocks tucked under you, and head poking forward — a posture that can flatten out the curves in your lower back, making it more susceptible to impact injuries.
- Step 5: Rock back and forth between these two exaggerated positions, allowing your shoulders to move in response but not focusing on their action or making it any larger than required by the pelvis shift.
- Step 6: Slowly lessen the swing until you find yourself coming to rest sort of in the middle to a neutral position that doesn’t over-curve or over-flatten anywhere.
TESTING YOUR POSITION
- Step 1: Place both hands palm down on your belly, with the base of your palms on your hip bones, your thumbs reaching inward, and your fingers pointing toward your pubic bone
- Step 2: Your hands should be perpendicular to the ground. If your fingers are farther ahead of your thumbs, your hips need to tip back a bit more. If your thumbs are farther forward than your fingers, you need to tighten up your abs and pull under a bit more.
- Step 3: When you find what seems to be neutral, take away your hands and see how this feels.
- Step 4: Are you feeling forced to bend your knees or as though you’re straining to stay in position? If so, you need to work on your leg and hip flexibility to help you along. You may also need to work on low back or front-of-hip flexibility to help you stay there, too.
2. Forward Bends
Benefits: Stretches and lengthens the hamstrings
- Step 1: Stand in Tadasana, hands on hips. Exhale and bend forward from the hip joints, not from the waist. As you descend draw the front torso out of the groins and open the space between the pubis and top sternum. As in all the forward bends, the emphasis is on lengthening the front torso as you move more fully into the position.
- Step 2: If possible, with your knees straight, bring your palms or fingertips to the floor slightly in front of or beside your feet, or bring your palms to the backs of your ankles. If this isn’t possible, cross your forearms and hold your elbows. Press the heels firmly into the floor and lift the sitting bones toward the ceiling. Turn the top thighs slightly inward.
- Step 3: With each inhalation in the pose, lift and lengthen the front torso just slightly; with each exhalation release a little more fully into the forward bend. In this way, the torso oscillates almost imperceptibly with the breath. Let your head hang from the root of the neck, which is deep in the upper back, between the shoulder blades.
- Step 4: Uttanasana can be used as a resting position between the standing poses. Stay in the pose for 30 seconds to 1 minute. It can also be practiced as a pose in itself.
- Step 5: Don’t roll the spine to come up. Instead bring your hands back onto your hips and reaffirm the length of the front torso. Then press your tailbone down and into the pelvis and come up on an inhalation with a long front torso.
3. Lateral Bend
- Step 1: Stand tall with feet and legs together and reach both arms straight up overhead as you inhale.
- Step 2: Lower your right arm down the right side of your body and exhale as you lengthen the left arm over the head, bending body gently to the right.
- Step 3: Follow Step 2 for the left arm.
4. Rotated Twists
- Step 1: Stand in Tadasana. With an exhalation, Step or lightly jump your feet 3½ to 4 feet apart. Raise your arms parallel to the floor and reach them actively out to the sides, shoulder blades wide, palms down. Turn your left foot in 45 to 60 degrees to the right and your right foot out to the right 90 degrees. Align the right heel with the left heel. Firm your thighs and turn your right thigh outward, so that the center of the right kneecap is in line with the center of the right ankle.
- Step 2: With an exhalation, turn your torso to the right, and square your hip points as much as possible with the front edge of your sticky mat. As you bring the left hip around to the right, resist the head of the left thigh bone back and firmly ground the left heel.
Step 3: With another exhalation, turn your torso further to the right and lean forward over the front leg. Reach your left hand down, either to the floor (inside or outside of the foot) or, if the floor is too far away, onto a block positioned against your inner right foot. Allow the left hip to drop slightly toward the floor. You may feel the right hip slip out to the side and lift up toward the shoulder, and the torso hunch over the front leg. To counteract this, press the outer right thigh actively to the left and release the right hip away from the right shoulder. Use your right hand, if necessary, to create these two movements, hooking the thumb into the right hip crease. - Step 4: Beginning students should keep their head in a neutral position, looking straight forward, or turn it to look at the floor. More experienced students can turn the head and gaze up at the top thumb. From the center of the back, between the shoulder blades, press the arms away from the torso. Bring most of your weight to bear on the back heel and the front hand
- Step 5: Stay in this pose anywhere from 30 seconds to one minute. Exhale, release the twist, and bring your torso back to upright with an inhalation. Repeat for the same length of time with the legs reversed, twisting to the left.
Note: There are many types of twists and one should exercise caution when beginning to avoid injury.
5. Inversions
- Step 1: From Mountain pose (Standing Straight), place the palms on the low back/sacrum with the fingers pointed down. Press into the feet, pull up the kneecaps and squeeze the thighs and buttocks.
- Step 2: Press the hips forward and begin to arch the torso backward. Keep the head looking forward, or if it feels safe to let it drop all the way back. Use the arms to support your weight and keep the legs and buttocks engaged and strong.
- Step 3: Breathe and hold 3-7 breaths.
- Step 4: To release: keep the legs, buttocks, and arms strong as you slowly inhale back up, letting the head and neck be the last to become vertical.
6. Dolphin Pose Inversions
- Step 1: Begin on your hands and knees.
- Step 2: Lower your elbows to the floor directly beneath your shoulders.
- Step 3: Tuck your toes and lift your knees off the floor.
- Step 4: Then, gently begin to straighten your legs.
- Step 5: Draw your shoulder blades into your upper back ribs and toward your tailbone.
- Step 6: Align your ears with your upper arms.
Note: There are many types of inversions with this and the Dolphin being #2 of the simplest.
A helpful article by WebMD: Yoga as Good as Physical Therapy for Back Pain
You Might Also Like These Similar Posts
6 Yoga Poses To Relieve Tight Hip FlexorsYoga for Back Pain Relief4 Yoga Poses to Relieve Anxiety Attacks |
