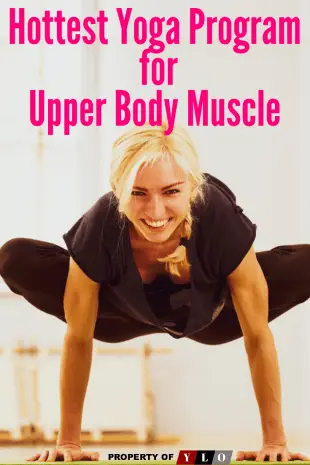
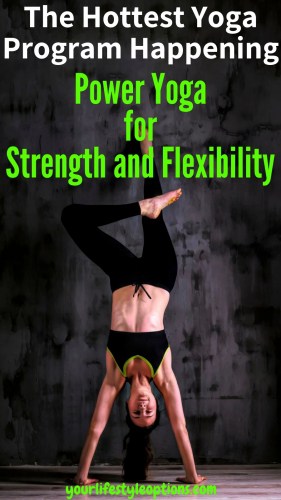
Hottest Yoga Program for Upper Body Muscle. Yoga has the ability to strengthen the upper body. This is because all the upper body muscles are engaged by the movements of yoga.
Why Are the Hottest Yoga Workouts So Ideal for Upper Body Muscle
It’s widely known that yoga is wonderful for loosening tight muscles, soothing body pains, and allowing you to find a center of peace within yourself. But what long-time practitioners of yoga also rave about is its ability to strengthen the upper body. The news is getting around and many have begun putting away their dumbbells in favor of settling down to a yoga mat for their strength-building needs. If you need motivation, just look at the results gained by the hottest yoga devotees: they have strong arms and shoulders, with a defined back.
How Does Yoga Create Strong Upper Body Muscle So Effectively?
It actually uses one of the best possible resources for strength training: the weight of your own body! Lifting your body is very challenging, actually more so than conventional workouts with dumbbells. Training with the weight of your own body is also superior because the workout is more functional and there are many different upper body muscles working together to perform the movements. When the weight you’re lifting is your own body, there is much less stress on the joints than is common with regular weight training.
The Power of the Plank
Planking’s popularity has reached far outside of the world of yoga and it’s now featured in most types of fitness programs. Why is this? Because it’s highly effective. Planking is a power move for creating strength in your upper body and core and it will give you terrific results. As you lift up your body and learn to breathe through the burn as it becomes more and more challenging, you will engage your core and upper body to build up those muscles. And the best part is that you can really see your progress as you continue. Start with 30 seconds if you can manage it and, as you continue with planks, you will notice how much longer it’s possible to maintain the form. You’ll soon see that you’re able to stick with it for measurably longer.
Hottest Yoga Routine for Building Upper Body Muscle
This routine was created especially to show you how effective the hottest yoga is for building upper body muscle. Begin by trying to hold each pose for a minimum of 30 seconds. Over time, you’ll be able to monitor how much more you can handle, as you strengthen those upper body muscles with regular practice. Eventually, you’ll be able to kick it up a notch by adding on another 10 seconds. Pay careful attention to the instructions of each movement, and focus on getting all the details of your form executed correctly. If you want to get real results, it’s extremely important to do the poses the right way.
The Chaturanga
Go into the plank form and then lower yourself closer to the floor and now you’re doing a pose called a chaturanga. This move is fantastic for engaging your core and also hits your triceps, biceps, and shoulders to create a defined upper body you’ll be proud to show off. The trick is to place your elbows close to you so that your triceps are the ones handling the load and getting those benefits.
• Start in the Plank Pose
• Hands under elbows
• Elbows under shoulders
• Abdominals and low ribs pulled in; core engaged
• Thighs pushing up
• Heels pushing back
• Hug all your muscles into the midline of the body
• Roll WAY forward on your toes (see pic below). Even more than you think you should. (This ensures you will lower down with your arms in a 90° angle.)
• Now begin to lower down until your arms form a 90° angle and stop just at that point.
The Upward Dog
Hold the chaturanga for as long as you can and then tuck in your feet, press your body upward with your arms and stay in place. Your stomach should be lifting as well but you should rely on your arms and shoulders to help keep you off the ground.
Step 1: Lie prone on the floor. Stretch your legs back, with the tops of your feet on the floor. Bend your elbows and spread your palms on the floor beside your waist so that your forearms are relatively perpendicular to the floor.
Step 2: Inhale and press your inner hands firmly into the floor and slightly back, as if you were trying to push yourself forward along the floor. Then straighten your arms and simultaneously lift your torso up and your legs a few inches off the floor on an inhalation. Keep the thighs firm and slightly turned inward, the arms firm and turned out so that the elbow creases face forward.
Step 3: Press the tailbone toward the pubis and lift the pubis toward the navel. Narrow the hip points. Firm but don’t harden the buttocks.
Step 4: Firm the shoulder blades against the back and puff the side ribs forward. Lift through the top of the sternum but avoid pushing the front ribs forward, which only hardens the lower back. Look straight ahead or tip the head back slightly, but take care not to compress the back of the neck and harden the throat.
Step 5: Urdhva Mukha Svanasana is one of the positions in the traditional Sun Salutation sequence. You can also practice this pose individually, holding it anywhere from 15 to 30 seconds, breathing easily. Release back to the floor or lift into Adho Mukha Svanasana with an exhalation.
The Dolphin Pose
There are not many moves that specifically target the upper body muscles of the back but this hottest yoga move is a highly effective one. The dolphin’s form is similar to doing a downward dog but your forearms are the ones on the floor instead of your hands. You’re pressing your forearms downward and using the back’s upper body muscles to press your chest down to your thighs while your heels are in the direction of the floor.
• Come to your hands and knees.
• Place your forearms on the mat, shoulder distance apart.
• Leave your elbows shoulder distance apart, then bring your hands together, interlacing your fingers.
• Lift your legs into a Downward Dog position.
• Come to your tiptoes, and draw your torso and hips forward, so that your chin comes into contact with your knuckles.
• Push yourself back to your forearm Downward Dog.
Repeat 10 to 20 times.
The Reverse Table Top
This pose helps build the muscles in your shoulders, arms and upper back and also stretches your chest while engaging your core and the lower back muscles. This pose is uniquely suited for targeting isometric strength in the whole body. If you’re finding it too much of a challenge to remain in a straight line, try bending your knees for a reverse tabletop that still delivers great results.
• Sit on the floor with your legs extended in front of you.
• Place your palms, with fingers spread wide, on the floor slightly behind and outside your hips.
• Press into your palms and lift your hips and torso toward the ceiling.
• Look up to the ceiling, point your toes, and keep your arms and legs straight.
• Keep your entire body strong and form a straight line from your head to your heels.
• Squeeze your core and try to pull your belly button back toward your spine. Hold the position for up to 30 seconds.
If your hips begin to sag or drop, lower yourself back to the floor.
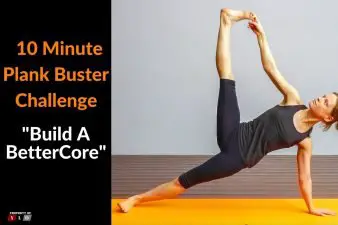
The Side Plank Scoop
This move is notable for its ability to tone the obliques. And it’s also a major workout for your arms, shoulders and the upper body muscles of the back. These muscles are engaged in helping to stabilize you as you lift off the ground and they also get a good workout during the scoop portion of the move. This is very effective for upper body muscle building. Begin with just the side plank and when you’ve got that one down, add in the scoop. If the full motion is too difficult, go ahead and rest your bottom knee on the mat for a little support.
Step 1: Begin in a full side plank position with right hand below the shoulder, left arm reaching high above left shoulder and legs long. (Modify by placing bottom knee onto mat if needed)
Step 2: Tighten abdominals and slowly scoop left arm under the body, following with your eyes until you see behind you.
Step 3: Slowly reach the left hand back to start position.
Repeat for the desired number of repetitions and switch sides.
The Tripod
Hottest Yoga practitioners know how beneficial this move is for improving balance. It’s the basic move that sets the foundation for learning to balance your arms by engaging your core properly. One advantage of this move is that you can use your head on the floor, along with your hands, to provide another “leg” to support you. Your whole upper body is fully engaged and it’s very challenging, especially as your core tries to become stable. Master the tripod and you can move right on to the crow pose.
Step 1: Start from a neutral tabletop position, where your hands are directly under your shoulders, knees directly under the hips.
Step 2: Slowly take the top of your head to touch the floor about six inches in front of your hands and lift your hips up and back so that your torso is almost vertically straight.
Step 3: Engage your core as you bend your knees and shift your hips forward to take your feet up.
Step 4: Gradually straighten your legs and you got it!
Try to stay for full five breaths and gently release the way you came up.
The Crow Pose
This pose has many similarities to the tripod but you lift your head off the floor, which gives a more intense workout to your upper body muscles that have to work hard to help you stay up. You have to build up your strength in order to start doing this move but you’ll be rewarded with a more defined upper body pretty quickly — all because of these highly effective hottest yoga moves.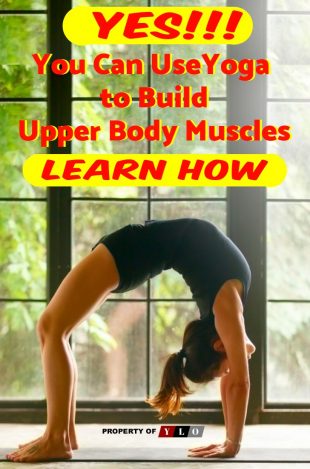
• Begin by standing at the top of your mat in Mountain Pose (Tadasana) with your arms at your sides. Step your feet about as wide as your mat.
• Bend your knees and lower your hips, coming into a squat. Separate your thighs so they are slightly wider than your torso, but keep your feet as close together as possible. If your heels lift, support them with a folded mat or blanket.
• Drop your torso slightly forward and bring your upper arms to the inside of your knees. Press your elbows along the inside of your knees and bring your palms together in prayer position. This is Garland Pose (Malasana).
• Bring your palms to the mat, keeping them about shoulder-distance apart. Spread your fingers and press evenly across both palms and through your knuckles.
• Press your shins against the back of your upper arms. Draw your knees in as close to your underarms as possible.
Lift onto the balls of your feet as you lean forward. Round your back and draw your abdominal muscles in firmly. Keep your tailbone tucked in toward your heels.
• Look at the floor between your hands or at a point even more forward, if possible.
• As you continue to lean forward, lift your feet off the floor and draw your heels toward your buttocks. If it’s difficult to lift both feet at the same time, try lifting one foot and then the other. Balance your torso and legs on the back of your upper arms.
• Keep pressing evenly across your palms and fingers, then begin to straighten your elbows. Keep your knees and shins hugging in tightly toward your armpits. Keep your forearms drawn firmly toward the midline of your body.
Touch your big toes together. Draw your belly in. Breathe steadily.
Hold the pose for up to one minute. To release, exhale as you slowly lower your feet to the floor, coming back into Garland Pose
Let us know if you have tried merging any of the hottest Yoga programs and Upper Body muscle workouts and how it is working for you. Our readers all are looking for information on what others are trying.
Click On The Images To View A Few Similar Posts