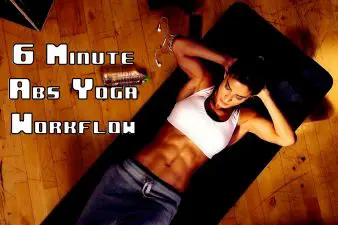
A 6-minute workout of Yoga Poses for your Abs will do the same job as killer crunches but without the ‘killer’ part. I used to believe that any form of exercise had to be more than just 6 minutes to be effective. Additionally, I thought the only way to get better abs was to do workout routines that included a massive amount of crunches and planks.
** Warning ** Don’t try these poses without a Yoga Mat!
If you don’t have one we highly recommend this mat –>you can pick it up for less than $20
<<Click Here For Latest Price>>
Yoga Poses For Abs in Just 6 Minutes
Personally, most of the ab routines I’ve seen are intense and not something I thought I could do. Through the years, I’ve found other exercise workflows that don’t take up as much time as long cardio workouts.

Yoga has become my main source of abs workouts, though when I can, I squeeze in some cardio too. A workflow of Yoga poses for Abs could take as little as 6 minutes to get started while also working out those core muscle groups.
Choose Poses You Are Comfortable With
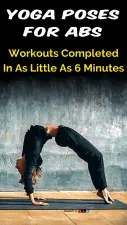
First, you want to find poses that you feel comfortable trying out in your workout. Some of the poses that have been in my own abs workout include the plank and side plank, though I’ve had to modify them to fit the needs of my joints. From a plank pose, one can simply drop down into the cobra pose.
From there, the yogi can raise themselves up into the upward-facing dog pose. Finally, from there, one can easily move into a half-moon pose.
Complete the set 2 or 3 times, hold each pose for at least 30 seconds and that gives the yogi a full 6-minute workflow. This workout should be performed 3-5 times a week to start.
Follow Your Own Style & Stick With It
The idea of excessive exercise sometimes turns a person away from any type of exercise, myself included. For every workout routine, one must follow their own unique style.
Swimming, yoga, and speed-walking for cardio are low-impact and together help keep the body, joints, and muscles functioning smoothly together. Mix all that with a better diet and drinking more water and you will lose that unwanted belly fat. The best part is you don’t need to feel the pain to get to better abs.
1) High Plank
- Start in Adho Mukha Svanasana. Then inhale and draw your torso forward until the arms are perpendicular to the floor and the shoulders directly over the wrists, torso parallel to the floor.
- Press your outer arms inward and firm the bases of your index fingers into the floor. Firm your shoulder blades against your back then spread them away from the spine. Also spread your collarbones away from the sternum.
- Press your front thighs up toward the ceiling, but resist your tailbone toward the floor as you lengthen it toward the heels. Lift the base of the skull away from the back of the neck and look straight down at the floor, keeping the throat and eyes soft.
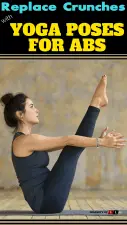
2) Boat
- Begin seated with your knees bent and feet flat on the floor, hands resting beside your hips. Draw your awareness inward and focus on your breath. Allow your inhalations and exhalations to be smooth, calm, and even.
- Keeping your spine straight, lean back slightly and lift your feet, bringing your shins parallel to the floor.
- Draw in your low back, lift your chest, and lengthen the front of your torso. Then, extend your arms forward, in line with your shoulders with your palms facing each other.
- Balance on your sit bones, keeping your spine straight. Take care not to let your lower back sag or chest collapse.
- Lengthen the front of your torso from your pubic bone to the top of your sternum. The lower belly (the area below your navel) should be firm and somewhat flat, but not hard or thick.
- With an exhalation, straighten your legs to a 45-degree angle from the ground, bringing your body into a “V” shape.
- Keep your breath easy, steady, and smooth. Focus your awareness within. Soften your eyes and your face. Gaze at your toes.
- Spread your shoulder blades wide and reach out through your fingers, actively engaging your hands. Stay in the pose for five breaths, gradually working up to one minute. To release the pose, exhale as you lower your legs and hands to the floor.
3) Warrior 3
- Stand in Tadasana (Mountain Pose), exhale and fold forward to Uttanasana. From Uttanasana, exhale and step your left foot back into a high lunge position. Your right knee should be more or less at a right angle. Lay the midline of your torso (from the pubis to the sternum) down on the midline of the right thigh (from the knee to the hip crease) and bring your hands to your right knee, right hand to the outer knee, left hand to the inner. Squeeze the knee with your hands, lift your torso slightly, and with an exhalation, turn it slightly to the right.
- Now from the lunge position, stretch your arms forward, parallel to the floor and parallel to each other, palms facing each other. Exhale and press the head of the right thighbone back and press the heel actively into the floor. Synchronize the straightening of the front leg and the lifting of the back leg. As you lift the back leg, resist by pressing the tailbone into the pelvis.
- Normally students come up into Virabhadrasana III by lunging the torso forward. This tends to shift the body weight onto the ball of the front foot and unbalance the position. Don’t allow the torso to swing forward as you move into position; instead, as you straighten the front knee, think of pressing the head of the thighbone back. This centers the femur in the hip joint, it grounds the heel into the floor and stabilizes the position.
- The arms, torso, and raised leg should be positioned relatively parallel to the floor. For many students, the pelvis tends to tilt. Release the hip [of the raised leg] toward the floor until the two hip points are even and parallel to the floor. Energize the back leg and extend it strongly toward the wall behind you; reach just as active in the opposite direction with the arms. Bring the head up slightly and look forward, but be sure not to compress the back of your neck.
- Stay in this position for 30 seconds to a minute. Release back to the lunge on an exhalation. Bring your hands to the floor on either side of the right foot, and on an exhalation, step your left foot forward to meet your right. Stay in this forward bend for a few breaths, then repeat for the same length of time on the other side.
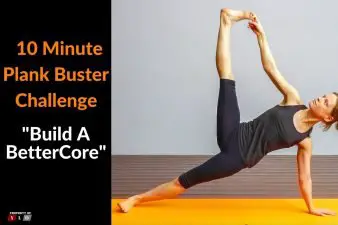
4) Side Plank
- Begin in Downward-Facing Dog (Adho Mukha Svanasana). Lower your hips and shift your weight forward to come into Plank
- Pose (the top of a push-up): Palms flat, body extended, with your legs reaching through your heels.
- Step your feet together and press your weight down through your right hand and forearm. Then, roll your body to the right, balancing on the outer edge of your right foot. Stack your left foot on top of your right foot and keep your legs straight.
- Beginners can lower their right knee and shin to the mat, keeping their hips lifted while building strength in the arms and torso.
- Extend your left arm to the sky, reaching through your fingertips as you lift your hips and firm the triceps of both arms. Feel the muscles across your shoulder blades flex. Firm your thighs, and press through your heels into the floor.
- Bring your body into one straight line. Gaze at your top thumb. Press down through your bottom index finger.
- Hold for up to 30 seconds. Exhale as you slowly return to Plank Pose, then into Downward-Facing Dog. Repeat on the opposite side.
A helpful article by WebMD: 5 Ways to Flatten Your Belly (No Crunches Needed)
You Might Also Like These Similar Posts